Tutorial
How to create an AI influencer with Higgsfield
GetBetterPrompts ·
Build one recognizable character, save its image, then bring it into video with Motion transfer. This walkthrough shows the Higgsfield controls we inspected and the decisions to make at each step.
The screenshots show the public interface as reviewed on October 12, 2026. Higgsfield may change its options or prices, so confirm the controls and cost shown in your own account before generating.
1.Open AI Influencer Studio
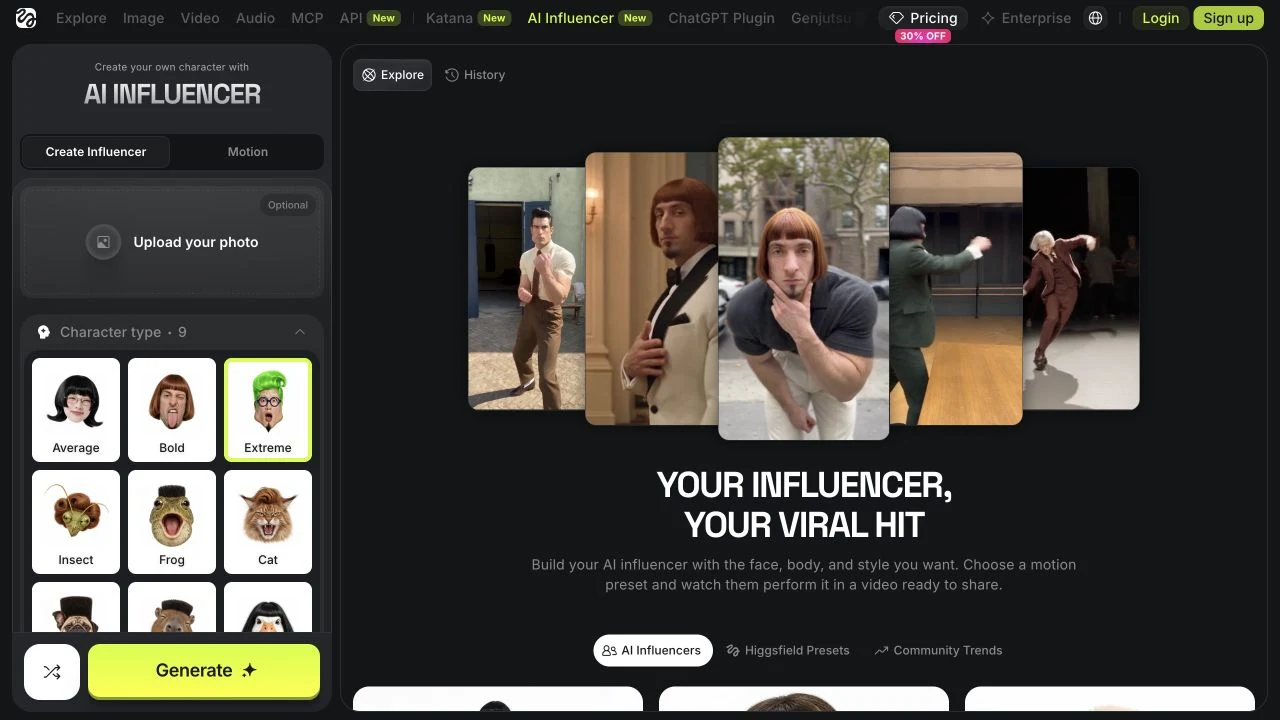
Open Higgsfield's AI Influencer Studio and choose Create Influencer. On desktop, the character settings are in the left panel; Explore and History are on the right.
You can inspect the public controls before signing in. Generation may require you to sign in and use credits. Check your account's displayed cost before you submit.
2.Choose a character type and look
Open Character type and compare the visual choices. In our captured panel, these range from Average and Bold to more exaggerated or animal-inspired looks. Pick the direction that fits your audience and format; the available choices may change.
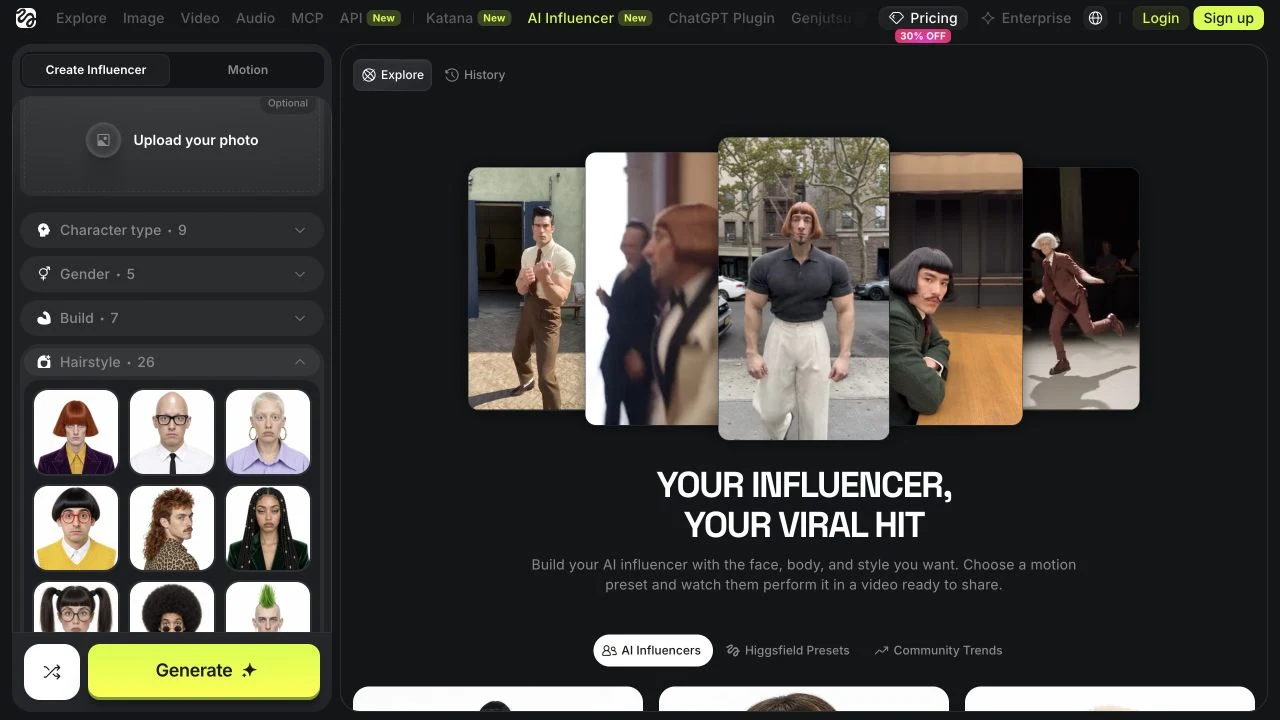
Then open the appearance groups you need, such as Build, Hairstyle, Hair Color, Style, Age, Distinctive features, and Accessories. Start with a few traits you can recognize and reuse across posts.
- Pick a recognizable face, hairstyle, and one distinctive clothing or accessory choice.
- Use the optional photo upload only with an image you have permission to use.
- Write a short character brief so you can compare later results with the same idea.
3.Plan your first clip and check credits
Choose one character and a short, repeatable format before spending credits. Decide what the character will do in its first clip so you can pick a suitable reference performance later.
Character images and motion videos may have different credit costs. Check Higgsfield's current pricing and the cost displayed in your account before you generate either one.
4.Generate and choose a reference image
Press Generate when you are happy with the settings. Review any sign-in requirement and credit cost that Higgsfield shows you before confirming.
Inspect the result for consistent facial features, hands, clothes, and accessories. Save the image you want to reuse. If it misses the brief, change one or two settings and compare again.
The screenshots in this guide show public controls, not a character generated by us. We did not run a generation in an account.
5.Animate the character in Motion
Switch to Motion and select Motion transfer. The current panel asks for a reference video to extract movement and for reference images of the character.
- Choose a reference video between 4 and 30 seconds, as shown in the studio.
- Add the saved character image. The panel accepts up to 30 reference images; start with the image you actually need.
- The captured panel shows an optional Prompt switch and a Quality selector. Review the current options and displayed cost before you generate.
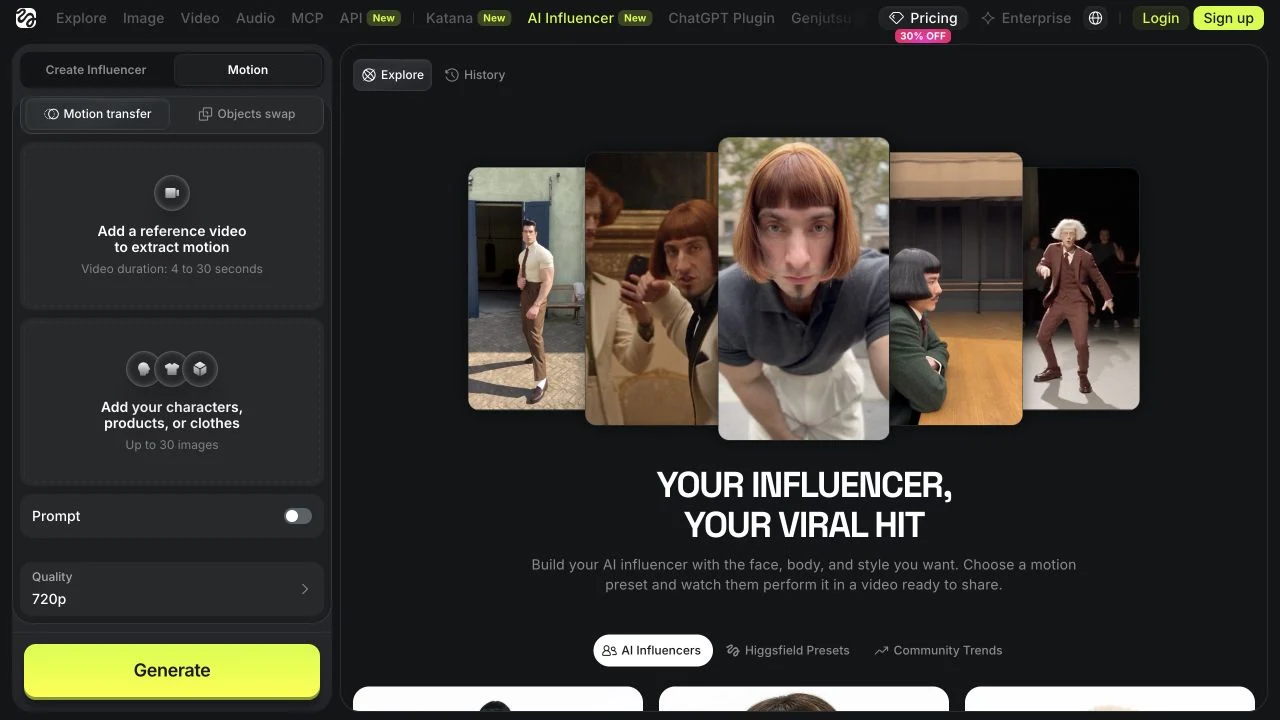
Use footage and images you have the right to upload. The screenshot shows the public controls before any files are added.
Now it's your turn
Start with one character and one simple motion. Save the image and settings that worked, then improve the next clip from that reference.
Create your AI influencer with HiggsfieldBack to the AI influencers overviewSources
- Higgsfield AI Influencer Studio (interface reviewed October 12, 2026)
- Higgsfield's AI Influencer introduction
- Higgsfield Genjutsu overview
- Higgsfield pricing
Related on this site: AI video prompt guide · AI image prompt guide · video prompt improver
6.Review and publish the video
Watch the full result. Compare the face, hair, outfit, and movement with your saved character image. If the identity changes or the motion feels wrong, simplify the reference performance or adjust one input at a time.
Export only a result you are happy with. Add captions and check the destination platform's current AI-media and advertising rules before posting. Higgsfield does not publish the clip for you.